Use Your POS For Donations – New Feature
The Tri-City Retail Systems team always welcomes suggestions from customers when it comes to new improvements to MyPOS Connect. If a suggestion has the potential to be useful to many of our customers, we happily add it to our development roadmap (check out our Recent POS Software Updates for lots of examples). A favourite feature suggestion came to us from one of our kind-hearted customers, who wanted MyPOS Connect to help them collect donations for a local charities. Our team thought it was an awesome idea, and we now proudly include donation functionality as a standard feature for all of our customers to leverage.
How does our POS Donation System work?
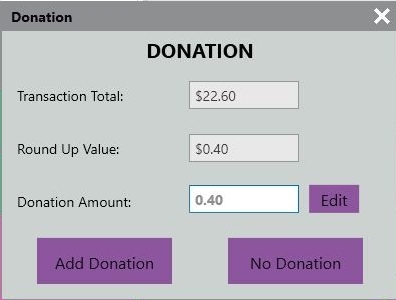
When the donation feature is active, it will trigger an automatic pop-up at the end of a transaction. Not only is this pop-up a convenient way to add donations to the transactions, it also ensures that no cashier ever forgets to ask a customer for a donation.

The transaction pop-up will auto-populate with the standard donation amount, rounding the transaction total up to the next dollar, and give the cashier the option to accept or decline the donation. If a customer is feeling particularly generous and would like to make a larger donation, and settings allow, the donation amount can be changed from this pop-up as well. From this point, the transaction can be tendered as usual. It’s that easy!
To set up the donation feature in the POS system follow these next steps in the MyPOS Connect Back Office:
Navigate to Data Setup, then Products, and create a new product for the donations, with Product Type set as “Standard Item”. Setup the product with, a Product Code, Description, Short Description, and Full Description of your choice. Setting a Primary Classification (i.e. Donations) will help with future reporting, but it is not necessary for donation functionality. Make a note of the Product Code you enter, as you will need this later. If your donations are non-taxable, make sure you select non-taxable from the Tax Code drop-down menu. Save the product.

Next, navigate to System Settings, then Device Options. On the left-hand side of the screen, click “Donations” to view the three associated settings.
To turn a setting on, check the ‘set value’ box for the desired setting and save. Note that settings can be configured based on the device. This means that each till lane and store can have its own unique settings.
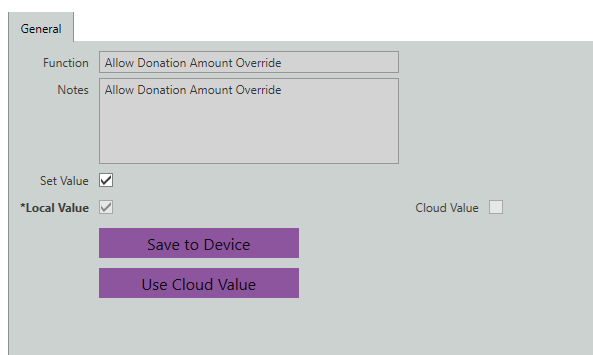
Allow Donation Amount Override:
The standard donation amount will round the transaction up to the next dollar. For example, if a transaction total without donation is $1.45, then the standard donation amount is $0.55. If you would like to allow cashiers to override this amount and enter a custom amount at the till, turn this setting on.

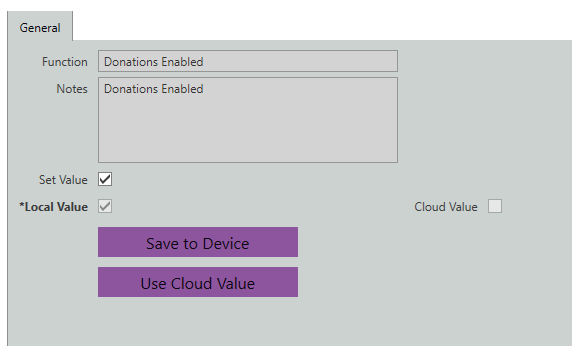
Donations Enabled:
This setting controls whether the donation feature is on or off. To use the donation setting, turn this setting on.

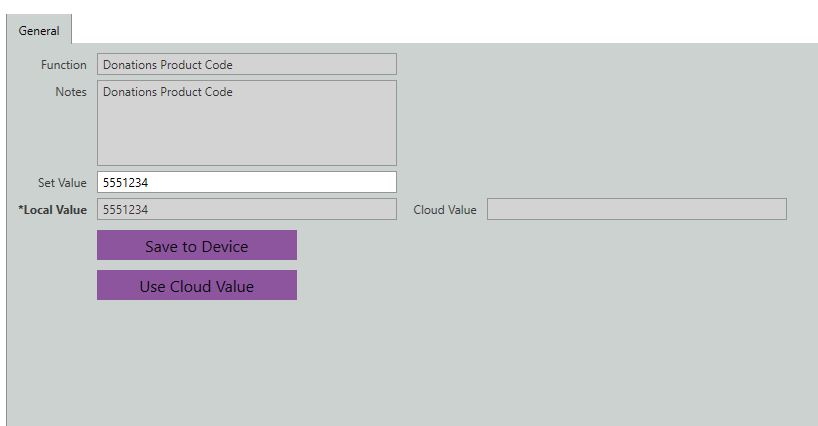
Donations Product Code:
This will link the donation feature with the product you created earlier. Enter your product code from the first step into the set value box and save.

Finally, restart MyPOS Connect to allow the new settings to take effect. The feature is now set up and ready to use.
Do you have any ideas for additions to MyPOS Connect? Email your suggestions to wishlist@tricityretail.com.

